Border Block
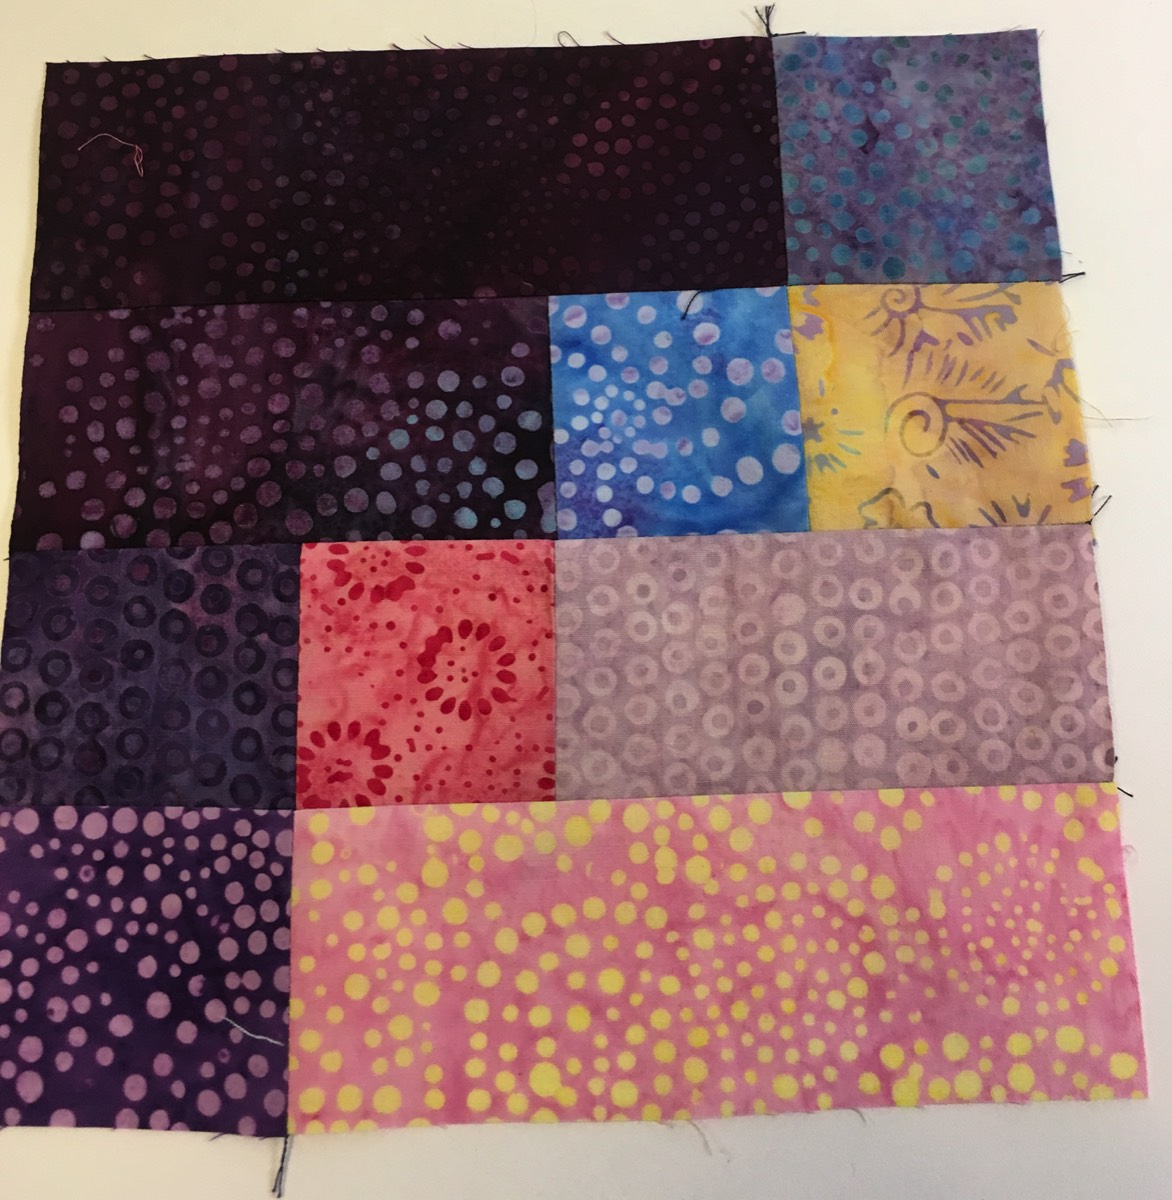
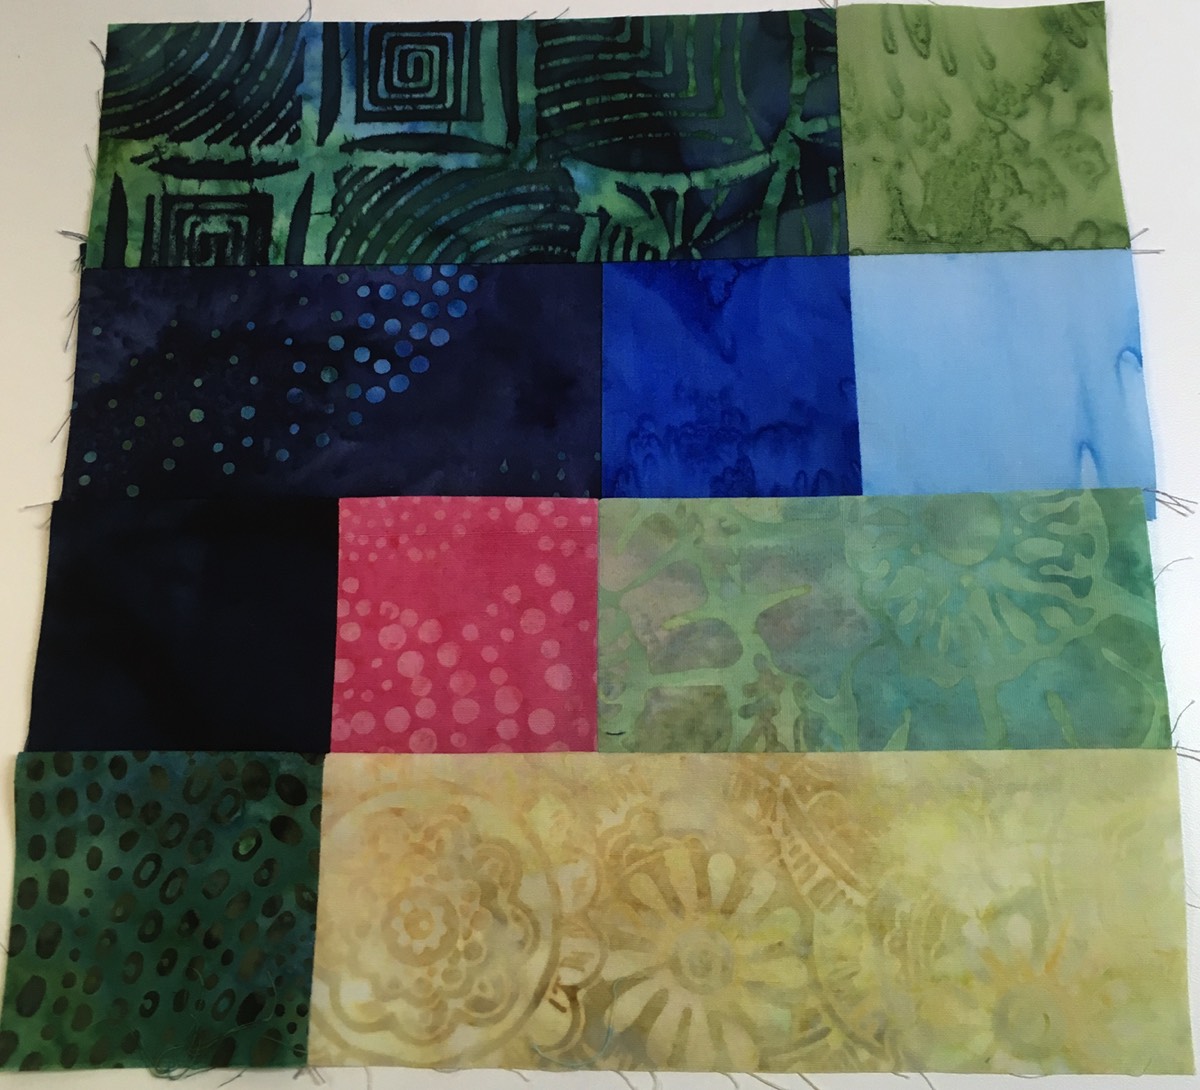
Again, we are using 2 ½” strips. Your fabrics for each block can be color coordinated, for example, all pieces in one block a shade of blue. Or they can be random colors. Just make sure that the darks ‘read’ as dark, mediums ‘read’ as medium and lights ‘read’ as light.
This block works well if you use the fabrics randomly. Try to use a different color for each piece in your blocks. Make several blocks using up your leftover 2 ½” strips. You don’t have leftover strips? Lucky you! You are free to cut some new strips, or I do have plenty in “The Box” of donated fabrics that anyone is welcome to use!!!
This block works well if you use the fabrics randomly. Try to use a different color for each piece in your blocks. Make several blocks using up your leftover 2 ½” strips. You don’t have leftover strips? Lucky you! You are free to cut some new strips, or I do have plenty in “The Box” of donated fabrics that anyone is welcome to use!!!
Piecing One Border Block
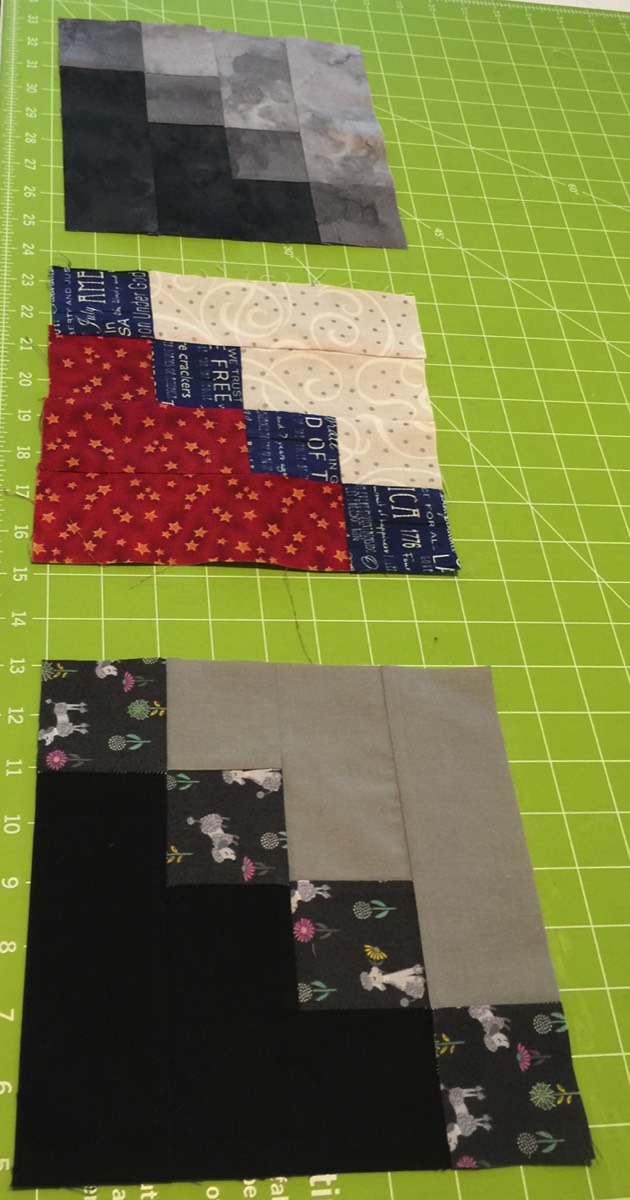
Each border block uses:
one 2 ½” x 6 ½” rectangle of dark color fabric one 2 ½” x 4 ½” rectangle of dark color fabric one 2 ½” square of dark color fabric
one 2 ½” x 6 ½” rectangle of light color fabric one 2 ½” x 4 ½” rectangle of light color fabric one 2 ½” square of light color fabric
four 2 ½” squares of medium color fabric
Arrange the pieces for a border block into four vertical rows and then sew:
Row 1. Sew a 6 ½” dark to 2 ½” medium square. Press towards the medium color.
Row 2. Sew a 4 ½” dark to 2 ½” medium square. Press toward the medium color. Then sew a 2 ½” light square to the medium. Press towards the medium color.
Row 3. Sew a 2 ½” square dark to a 2 ½” medium. Press toward the medium color. Then sew a 4 ½” light to the medium. Press toward the medium color.
Row 4. Sew a 2 ½” square medium to a 6 ½” light. Press toward the medium.
Sew the four vertical rows together and press seams (directions below) to complete the block.
Press the seam allowances as follows.
Press seam 1 towards row 1
Press seam 2 towards row 1
Press seam 3 towards row 4
Click here to download
a PDF of
printable instructions.